Here is some of the furniture I built between 1999 and 2004. It's not everything, but it includes some of the larger pieces.
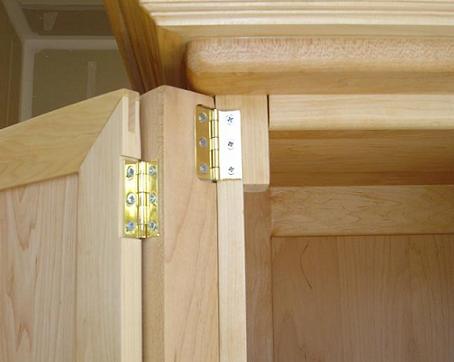
Entertainment Center
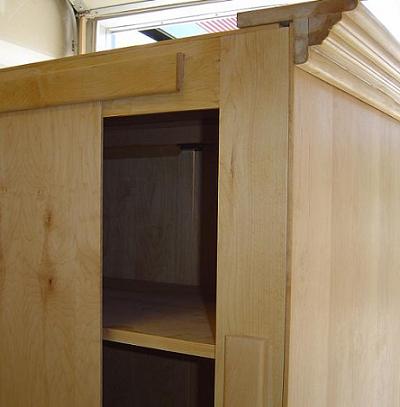
Before TV's went flatscreen, entertainment centers like this were used to hide big bulky CRT TV's. I decided to build one, and now the electronics world has changed, I will probably use it for linens but also possible for some electronics.
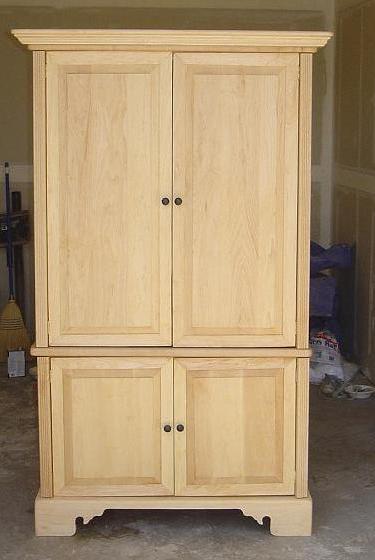 | 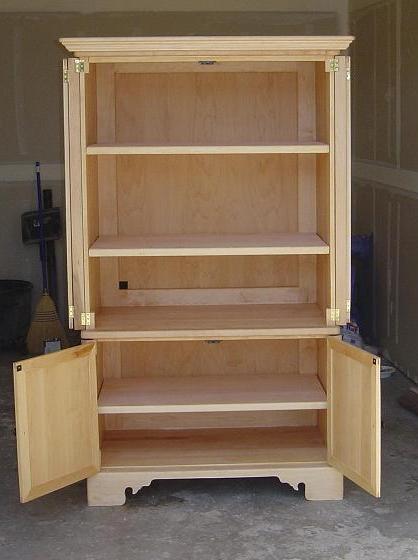 |
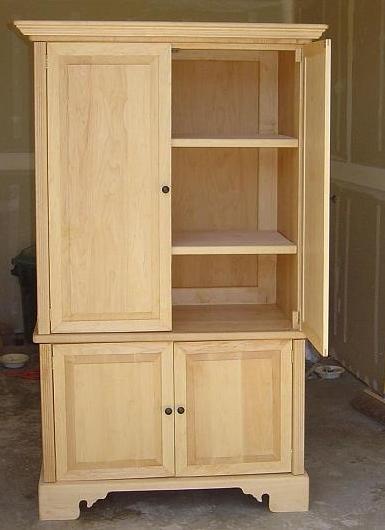
The whole piece is large, so the top and bottom are separate and can be moved independently. The back frame is tenoned frame for structural rigidity, but also has a sliding panel for easy access to wiring. The top doors are double-hinged, so they can fold flat against the sides of the cabinet and expose a TV screen. The notch in the sliding back panels allows power cords and speaker wires to leave the case.
 |  |
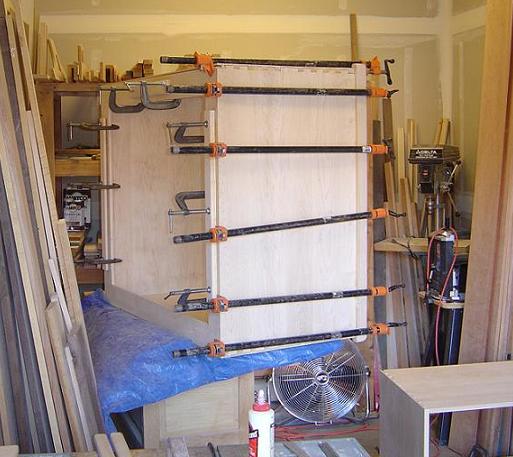
Below are two of the many pictures of the construction. One shows the dovetails of the upper case, and the other shows some of the main case assembly. The top of the case was too large for a dovetail jig, so these were hand-cut.
 |  |
Workbench
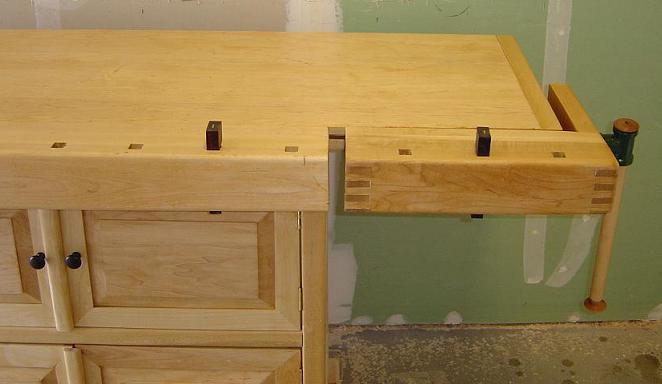
My new workbench has some traditional design points and also some non-traditional ones. For example, it differs from a traditional European-style bench in that I made an enclosed base, use a different style of vise at one end, and have no tool tray.
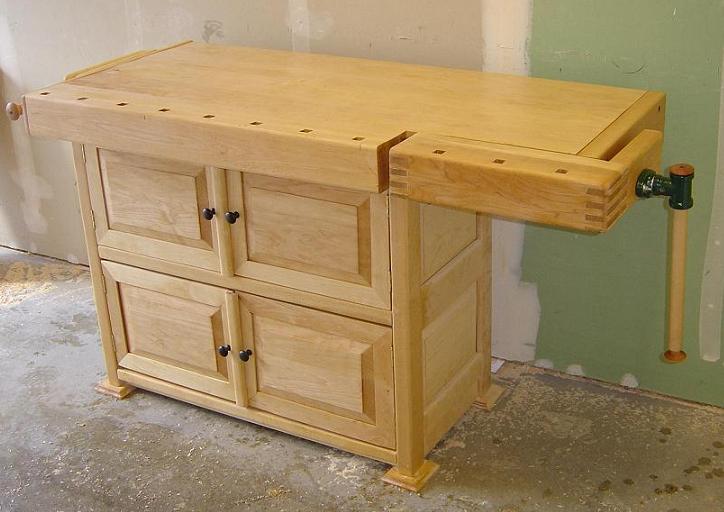
I made the bench dogs out of various exotic wood scraps I had lying around.

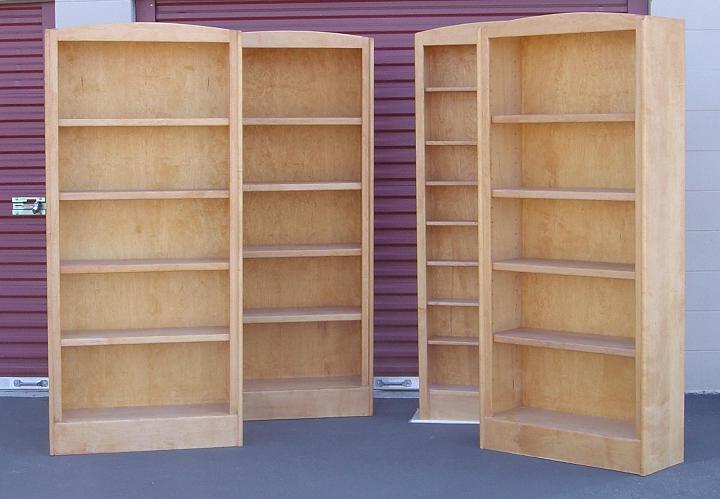
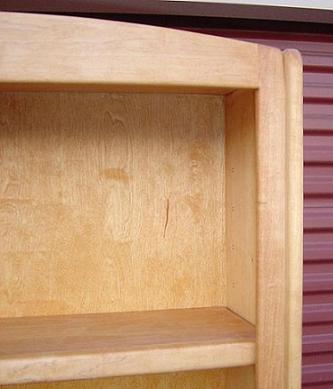
Bookcases
My set of bookcases have an unusual face - the side is bull-nosed and the front frame is recessed, rather than using the front frame to cap the edges of the sides. I got this idea from a piece I saw in a Scandinavian furniture store in Seattle - I didn't come up with it myself. Still, I think it is a nice design detail to liven up an otherwise simple piece.
Grandfather Clock
This is the second of two grandfather clock cases I built for my mom while I was in Seattle. This case holds a Hermle movement, and is built from walnut finished with a simple clear Danish Oil. It's amazing how the walnut darkens with the oil. The case worked out well, and my mom used it as her main clock for years. This picture shows the whole clock assembled but, like many clocks, the top of the case is a separate unit which slides off to expose the movement. Also, this picture has the green plastic film on the pendulum weight, but that was just for protection during shipping.
These pictures also show the shop I used in Seattle. It was basically a garage in one of the ActiveSpace buildings in Seattle, and was just a few blocks from the Seattle zoo. This was where I spent my weekends while I was working at Microsoft: eating burritos, making furniture, and taking breaks by walking around the zoo.
Next to the case is the plywood shipping container I built to ship the clock from Seattle to California.

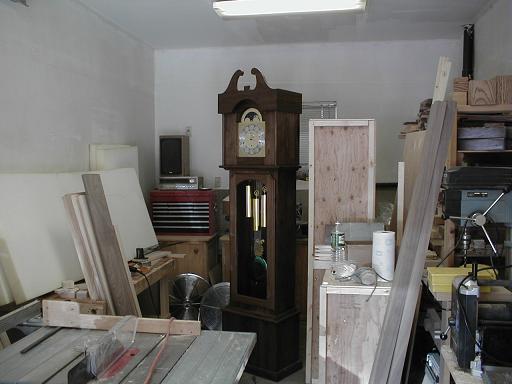
Here are some construction pictures. In the background of one of these, behind the Delta table saw, you can see a DEC Vax-750 and PDP-11/23 that I kept in the workshop. I went a little nuts on eBay for a while, and started collecting these things, but a few years later sold them all off when I moved back to California.


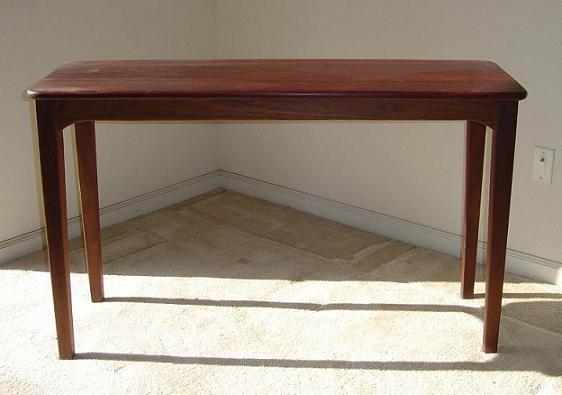
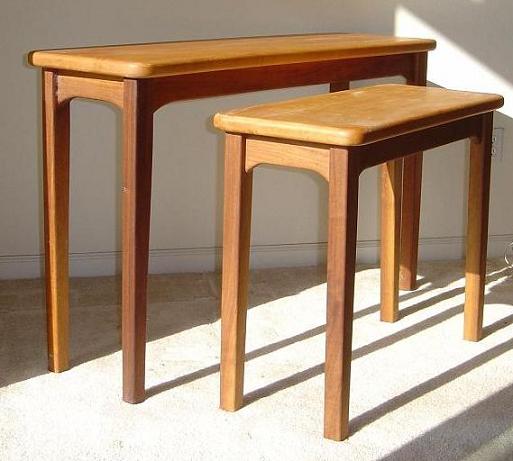
| Side Tables Here are a few of a group of side tables I built. They were all narrow and long, like a sofa table, and made of different combinations of wood species. Each had one for of wood for the top and a different contrasting type for the legs and rails. For example, I tried Padauk tops on walnut legs, maple tops on walnut, and more. The tops have a keyed block that fits into slots in the rails, so the top floats to allow wood movement, but still is secure with no screws or hardware. | 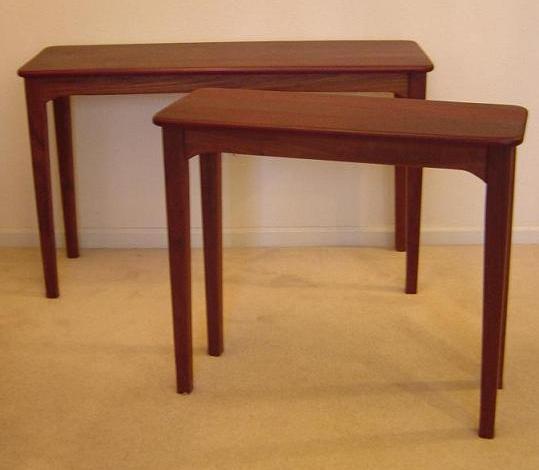 |
 |  |
| Bed I have made several beds, but this is the one that I still currently use and it was made around 1997. If I ever get a workshop going again, I have designs for a much more elaborate bed. This current bed is maple, and I made the base higher so the mattress is higher off the floor than normal. If I sit on the side of the bed, my feet don't touch the floor, and I really like that sense of height when sleeping. Originally, I made the base high enough so that it would be a normal height even with a thin futon. Later I swithced to an extra thick and soft mattress and now the bed is unusually high, so this was a fortunate accident that I will repeat in future beds. | 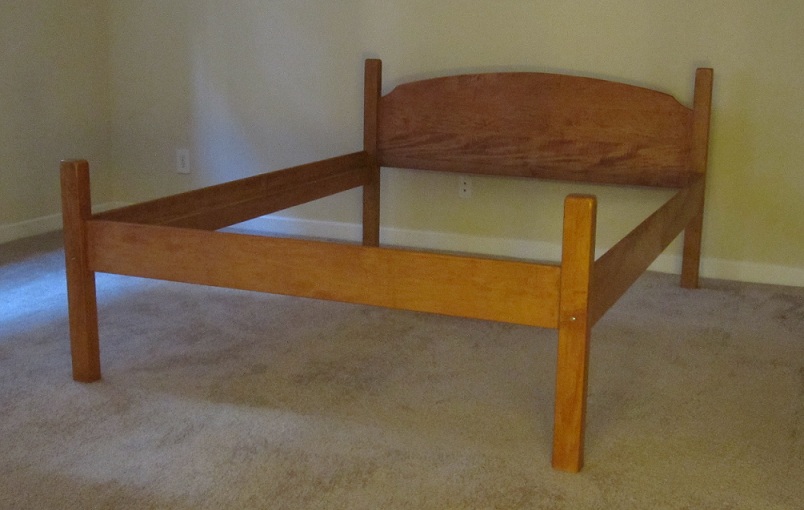 |
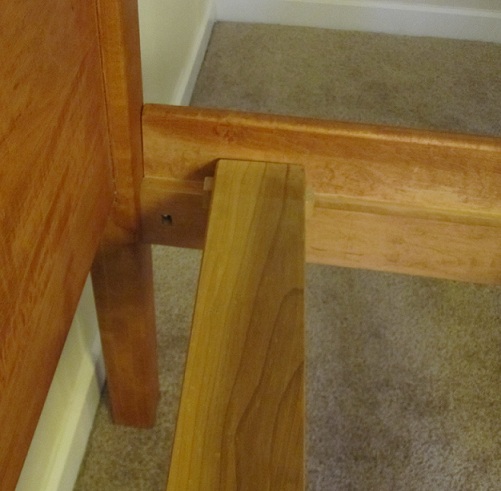 | The rails have tenons that fit into mortices in the headboard posts. More importantly, I use a bolt with a captured nut in the rails to lock them firmly in place. The bed is very solid when these bolts tighten down. All of the weight transfers from the matress to slats, to these rails to the posts. Notice that the larger side piece of the rails is actually non-weight bearing but does add to the rigidity of the rails. I think this is important; a lot of beds use metal brackets to attach the rails to the four vertical posts. But, this means all the weight of the bed rests on these four metal bracket assemblies. In my bed, all of the weight is on these two stiffened rails, and the rails extend to fit into mortices chopped into the posts. I originally made some 1 to 2 inch slats out of maple to run cross-wide between the two rails, but found they would sag with the weight of a heavy mattress. I read an article on bedmaking in Fine Woodworking where the author said he used 2x4's for his slats. If it's good enough for Fine Woodworking, then it's good enough for me. I bought some redwood 2x4 that had few knots, then planed then down to clean up the surfaces, then rounded the edges with a router roundover bit. The result is a really strong base, which is basically as strong as floor joists. These slats sit on the rails, which are tenons into the headboard posts, so all weight is directly translated through the rails to the vertical posts and the result is quite strong. |
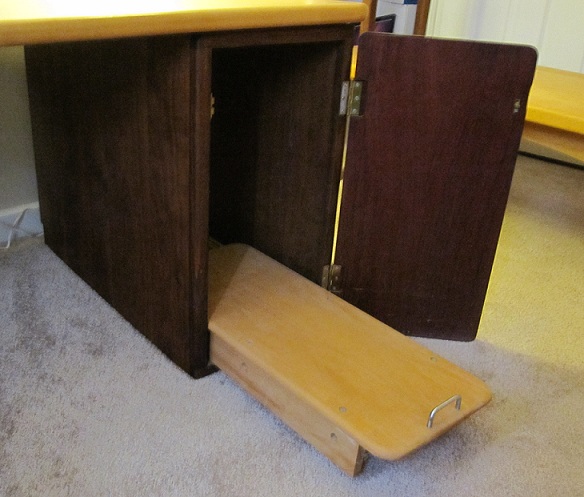
Desk
This is a desk which is basically a thick slab maple top and two cabinets. It's sort of a hardwood handmade version of putting a door on two filing cabinets, which I always liked. The left cabinet is a set of three drawers, and the right cabinet was an attempt to make a computer case.
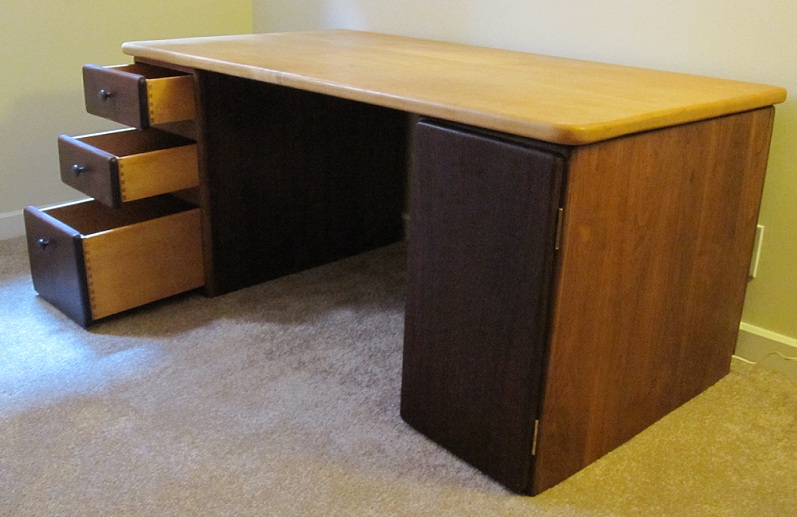
The right cabinet has a single large door, with a sliding maple tray that a desktop PC can sit on. My goal was to insulate the sound, but it does not ventillate well and is also inconvenient when trying to access the back panel of the PC, so I do not use it for holding a computer. Sigh, another experiment that didn't pan out. When I start another workshop, I will build a new desk with much different supports that are not enclosed cabinets.
Monitor Stand
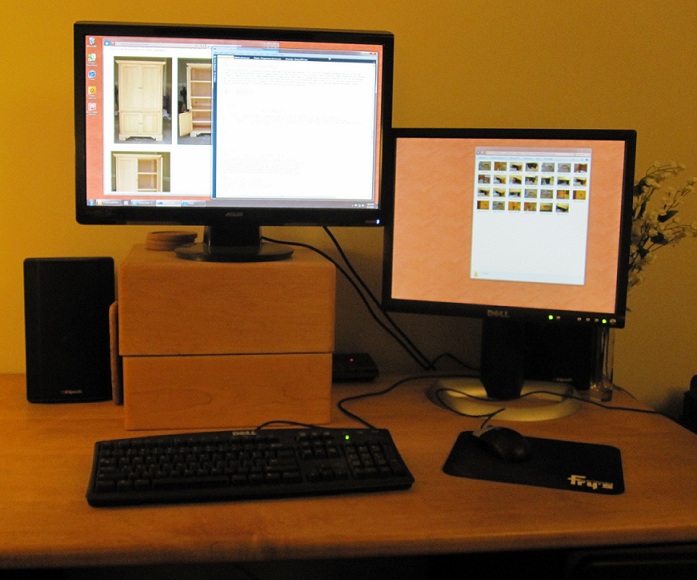
I had some scrap maple and made a hardwood box that is a stand for my monitor. This isn't fancy, except it is worth pointing out that this took little time to make and replaces all the stuff like reams of paper and other things that people normally use to lift a monitor to eye level. Really, why doesn't everybody do this? I made several that are the same base dimensions, so I can stack them to raise and lower the monitor.
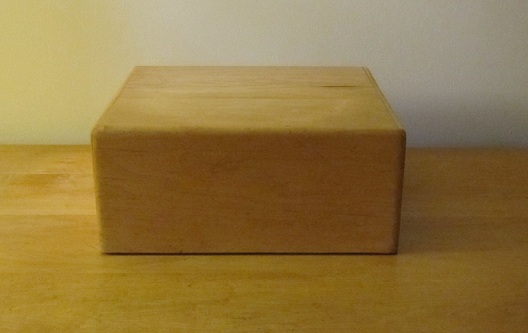
As a tribute to recursion, the second picture is taken of my computer while I was editing this very html page (I use a text editor and write the html by hand).
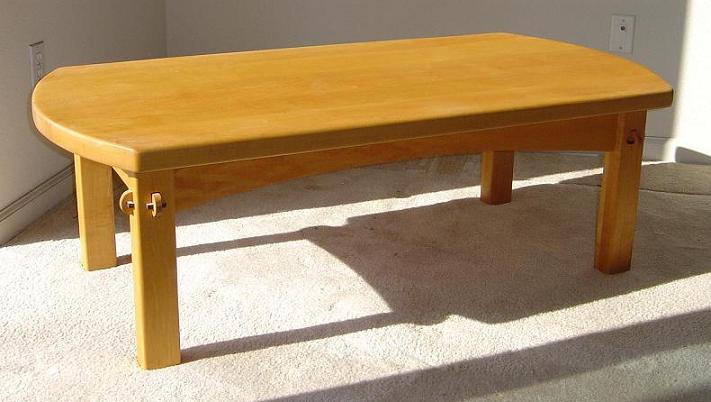
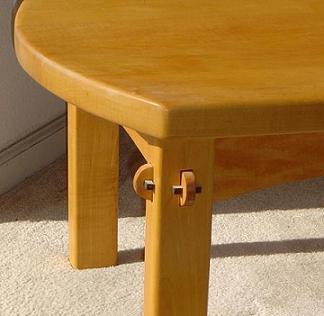
Coffee Table
This coffee table was one of those projects that was easy and came together fast; I drew it on a napkin and quickly built it by eye. I made the top from 8/4 maple, because I like the idea of a large piece of wood with a lot of presence. This was my first experiment with using a locking tusk on a through mortise. I originally bought the maple boards in San Jose at a deep discount because they were sticker stained, but they cleaned up well.
 |  |
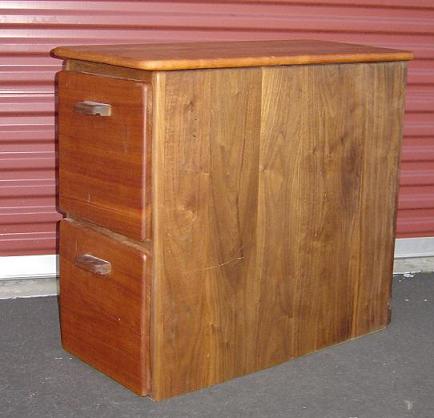
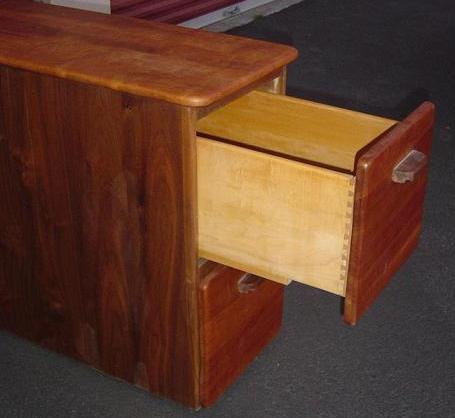
Filing Cabinet
I was surprised how banged up this cabinet looks in the photo; I built it cleanly, it just got scratched from hard use.
This piece was really designed around the top, which was a very pretty piece of cherry I had in the shop that had really nice grain patterns. Unfortunately, it was narrow, so I had to bend over backwards to build a filing cabinet around it. For example, the drawer slides are mounted below the drawers on wood rails, not on the sides of the drawers like you would normally do. I couldn't build the case any wider and still fit the top.
 |  |
| Nightstand Below is a nightstand that was part of several tables I built all at once as an experiment with making multiples. This piece only needed one drawer, so dovetailing it was not too big a job. | 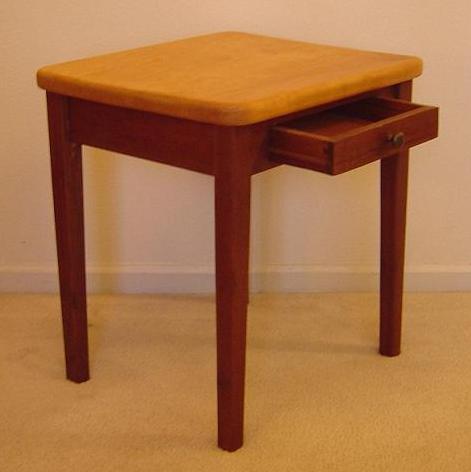 |
| Stereo Cabinets These two pieces were my Waterloo. I spent months drawing them over and over until I settled on the design, and then I decided to build two of them because I had just finished making a bunch of tables, and making multiples had worked well. It took me the better part of a year to finish these, and unfortunately there is a big design flaw. The case is a walnut frame with floating cherry panels; the cherry sides are floating, so all structural strength comes from the frame. That's great, but I made these walnut frame too narrow, so the pegs to support for shelves barely fit. Really, a shelf needs at least two inches or more of overhang to sit easily on a peg. This means the walnut frame need to be pretty large (I don't know, maybe six inches wide? More?) to accommodate a slot for the floating panels, space for holes to accommodate shelf pegs, overhang for the shelves, and recessed hinges for the door. Because I made the rails too narrow, the shelf barely has enough overhang on the peg. I designed these to work as a stereo rack, and I used one of them for that purpose when I lived in Sunnyvale, but the shelves just aren't secure enough. I may adapt these two to narrow armoires, which makes sense since my "stereo" these days is just iTunes on a laptop. I still like the overall design, however, especially the idea of a walnut frame with floating panels of a contrasting wood. I also like the idea that the frame extends into the legs in a single piece of wood. If I ever do something like this again, I might try to make something like a silverware chest. I would also make the frame more interesting with tapered legs and possibly a convex side to the frame. By the way, this picture shows my workshop in Berkeley California, which was also at an ActiveSpace building. This was where I spent my weekends while I was working at VMware. | 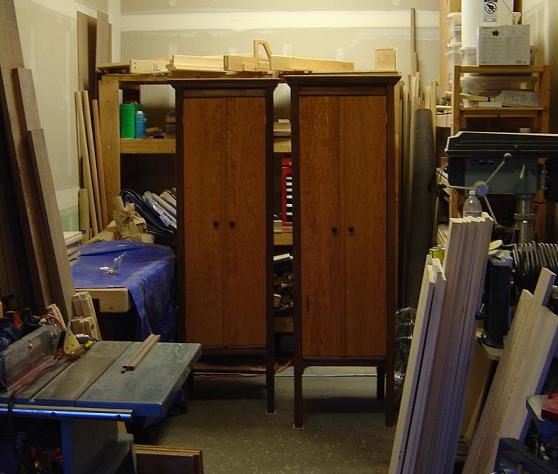 |
| Steel Falls This is a steel sculpture I made while I was a graduate student at Cornell. This is a stylized form of the water falls in one of the gorges on Cornell campus. I used to walk past that water fall each day while going to my office in the computer science building, and so I decided to make the piece. The silver "water" is just several welded pieces of polished 3/16 plate steel, with a clear polyurethane finish. The black "rocks" are 3/16 plate cut with a torch and finished with gunmetal blue. | 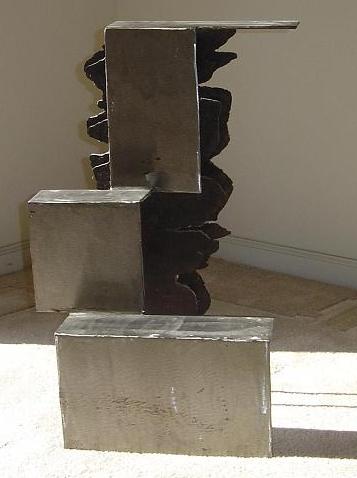 |  |
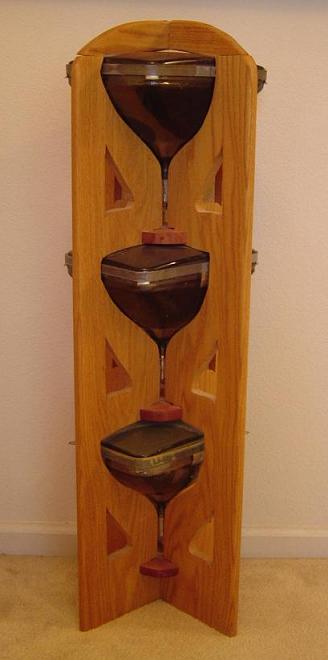 | TV Tube Tower This is a simple piece I made from some TV tubes, and it was actually a last minute design. I had previously collected a lot of TV tubes (mainly from old VT-100's that were being thrown out) for a different piece that I still have but didn't turn out as well. The piece shown below was made quickly to find a use for 3 CRT tubes I had left over from the other piece, and oddly I like it a lot more. The frame is made of oak, which is a wood I almost never use. |
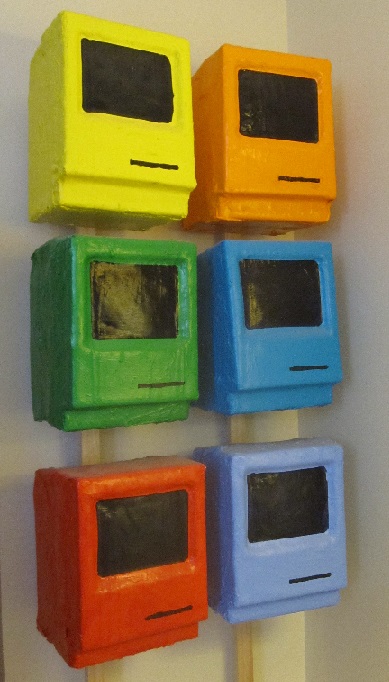 | Fiberglass Macintosh Castings I built this around 1997 or so, and at that time, there was no iMac, and almost all of computers were plain beige boxes designed for a corporate office. The only exception that I was aware of were SGI's Indy and Indigo boxes, which were a solid purple. At this time, I was really into Keith Haring's work, and I was also thinking about technology as art. And, of course, I was also thinking about Warhol's use of repetition. Finally, I was hugely moved by Claes Oldenburg's Breakfast Table So, it wasn't a big stretch to do a Haring-esque take on Macintoshes. But of course, after I built this Apple later came out with colored iMacs, iPods, iPhones, and now the whole idea looks really cliche. It's also interesting that such an iconic design as the original Mac is fading from popular culture in so short a time. Soon, kids won't even recognize these boxes as anythng to do with computers. |
Non-Shojis
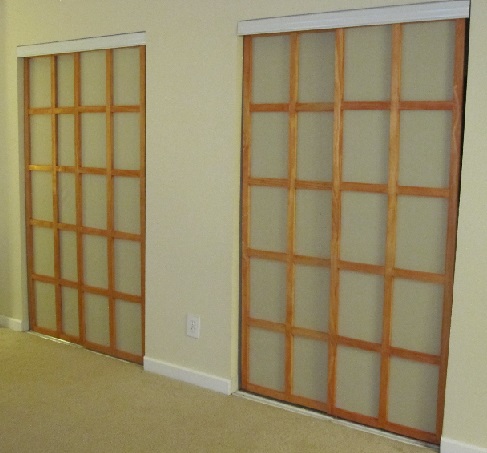 | This is a set of screens I built over 2013 and 2014. These are patterned after Shojis but have some basic differences that really prevents me from calling them a true shoji. First, I built these while living in an apartment during medical residency, so I did not have access to my workshop. As a result, they are built with lap joints rather than mortice and tenons. The wood is also pine (ugh) which has been lightly stained (double ugh) and the rales and stiles are the same width as the cross pieces. Still, there are some nice ideas here, and when I get my shop set up again I will build a new set. Those will also be non-traditional, but in a more designed way. I want to use Cherry, finish it with a clear tung oil or similar finish and use mortice and tenons or possibly dowel the joints depending on clearances. |
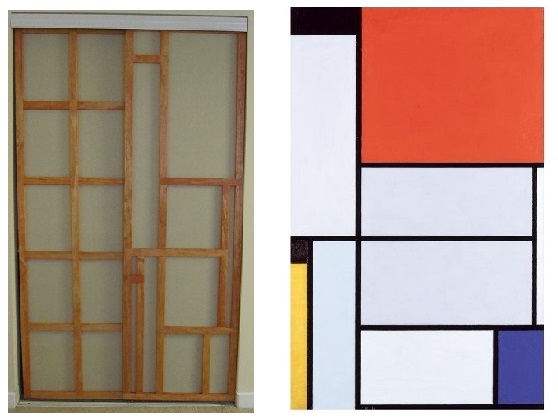 | On the far left is another set of non-shojis I built, and the right screen in a very non-traditional design. To the right of this is a picture of Piet Mondrian's "Tableau 1" from 1921 that I used for a pattern. |